Before you enter the Terrain Park for your first time, here are a few tips to help make your first experience a positive one.
1. Always scope out the park.
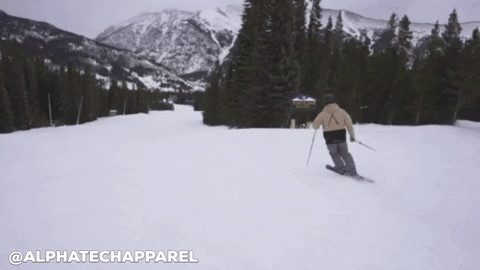
This means taking a lap through the park, slowing down to take a look at features, landings, take-offs, and more. When you are cruising through checking out the “features” (jumps, rails, boxes, berms), make sure you are out of the way of anyone hitting features. That means not hanging out near or around landings, take-offs, and or even standing too close to jumps and rails. This rule applies to anyone hitting the park for the first time that day. Sometimes the park crew changes things up overnight and you always want to be fully aware of what the park is looking like that day.
2. Start small.
This one is self explanatory, never drop in on the largest, scariest feature you see. Find features that are “ride ons” meaning you don’t need to jump or “ollie” to get onto the feature, and look for jumps without a “knuckle.” See images below for examples of great beginner features:
3. Don’t get intimidated by other skiers and boarders.
Going into a Terrain Park for the first time can be nerve wracking for many reasons, but one of the most common themes for being nervous is looking silly or inexperienced in front of others. Bottom line is, everyone starts somewhere, and how you feel on that first day is how anyone feels entering the park for the first time. Just be polite, wait your turn, and don’t get discouraged by other people.
4. Understand park etiquette.
Ever wonder why everyone seems to stand at the top of the park together before dropping in? This is proper Terrain Park etiquette: waiting for your turn to drop in so that way you don’t collide with someone.
Riding or skiing in the Terrain Park is very different from cruising down a regular trail. There are unspoken rules of the park such as waiting your turn to hit a feature, telling others when you are dropping into a feature, and not hanging out in unsafe areas such as next to a feature, or in a landing. Following proper park etiquette prevents collisions, and creates a safer place for everyone to be in.
5. Have fun with it.
Seriously, if you are not having fun, then what’s the point, right? Don’t scare yourself by trying to learn too fast, and don’t be ashamed of hitting the same dance floor 100 times before you try boardsliding a rail. Everyone learns at a different pace, and try not to get discouraged and just enjoy the ride.
Want to know what to wear your first time in the Terrain Park? Check out our Softflex. The Softflex keeps you warm, dry, and comfortable during those chilly Terrain Park progression sessions.
]]>A prerequisite for learning to ski backwards is being very comfortable skiing forwards, with proper form (parallel skis, controlled stops, turns, and edges) and being able to ski some of the more difficult terrain at your home mountain. If you plan to take this skill into the terrain park, get comfortable with straight-airs off of small jumps and rollers.
HOW TO SKI BACKWARDS
1. Starting backwards on a mellow run.
You should start on a low angle slope that you feel very comfortable controlling speed on (a green/blue run). Stop somewhere clear of obstacles and allow yourself to start skiing backwards from a controlled stop.
2. Proper positioning while skiing backwards.
When skiing backwards your knees should be approximately your shoulder’s distance apart with your weight centered. Arms should infront of your waist, somewhat in front of you. Keep that chest up, back straight, and resist the common flaw of folding at the waist.
3. Turning backwards on skis.
Stagger your legs a little so that one ski is further back than the other. This will be how you will turn. If your right ski is further back, you should then rotate your shoulders and hips so that you are looking over your right shoulder. To review: ski that is further back, look over that shoulder. By doing this correctly, you will carve towards the left (the opposite shoulder you are looking over).
4. Linking turns backwards.
To link your next turn, let your left ski fall further backward while you rotate your shoulders and hips to look over your left shoulder. Doing this will let you turn to the right. BAM you just linked your first turns skiing backwards.
IMPORTANT THINGS TO REMEMBER WHILE SKIING BACKWARDS
1. Always look downhill to see where you are going.
It may feel awkward at first, but you should be constantly looking over your shoulders to see downhill. If you turn your upper body fully rather than just glancing over your shoulder you will have a better view of where you are going, or terrain park features you are approaching. This is key to your own safety, and also the safety of other skiers and riders on the mountain.
2. Control your speed.
Just like when you learned to ski forwards, turns are key to controlling speed, NOT pizza-ing your skis (referring to the beginner technique of pizza/french fries). Resorting to the “pizza” method may indeed slow you down, but it is not as safe, and linking turns correctly will benefit you in the long run. The deeper you carve, the quicker your skis will turn up towards the mountain and reduce your speed.
3. Link turns both ways.
When skiing backwards, it is common for skiers to prefer to either carve to one side more than the other. We tend to be side-dominated, but it is very important to try and link turns similarly to how we ski normally, both sides evenly. It may feel awkward looking over each shoulder, but once you get the hang of it muscle memory will make it feel easier.
4. Have proper equipment.
Although it is possible to ride backwards on normal skis, it is recommended to ski with “twin-tip” skis. Twin-tip skis are rounded and curve up at both ends. The curve on both ends, rather than just the front with most skis, prevents skis from snagging and scraping the snow while skiing backwards. Twin-tips get stereotyped as just terrain park skis, but they work great as all-mountain skis too, especially if you plan to ride backwards.
5. Be consistent with practicing skiing backwards.
As they say: practice makes perfect. Most skiers will say that with plenty of practice, skiing backwards will become second nature, and can be a very fun way to cruise the mountain, or up your tricks in the terrain park.
We hope this helps you stomp some backwards skiing this season! Make sure you tag @alphatechapparel in your pictures and videos of you skiing backwards for a chance to be featured!
]]>It's called a frontside 180 because the front side of your body is facing downhill throughout the 180 degrees of rotation, instead of “backside” where your back faces downhill while rotating. Backside 180’s are a bit more challenging for most snowboarders.
First, you want to be comfortable riding “switch” (with your opposite foot forward). This should be practiced ahead of time.
Once you feel comfortable riding switch, find a low angle slope, and start by sliding 180's on the snow.
Steps to slide a frontside 180 on the snow:
*Note* your board should never leave the ground.
While you're sliding the Front 180 on snow, it's a good time to add some rotational movements with your upper body. The key is to wind up, then swing your shoulders and arms into the turn to create the momentum required for the 180. To wind up, start with your shoulders pivoted back the opposite side you are rotating, then carry that momentum through center over to the otherside into your frontside 180.
To step it up - try taking some weight off your board by slightly extending your knees, but keep the board in contact with the snow. This technique allows you to get comfortable with the feeling of jumping a front 1, without actually leaving the ground.
As you get better with your surface Frontside 180’s on the snow, you can then add pop by extending your legs as you leave the takeoff. The more height results in needing less rotation throughout your spin, meaning you can spin a bit slower. Your 180's will come around easier and it will make them look floaty, and stylish.
As you're adding some air time, always remember to absorb your landings by bending your knees to help cushion your landings, landing with straight legs may make you unbalanced and unstable.
You can practice these by finding small bumps in the snow, or rollers to grab some air time off of.
Side hits are little hips, or “jibs” on the side of a trail. Side hits are a jump or berm that you approach on an edge and are a great place to try your first frontside 180’s with some air time, plus the landings may be a bit softer than off a jump in the terrain park. They're a fantastic place for frontside 180's because approaching the side hit on your edge gives you some grip in the snow, which is essential for all spin tricks.
Tag @AlphatechApparel on Instagram in your first frontside 180’s and leave a comment below if this helped you land your first front 1’s!
]]>